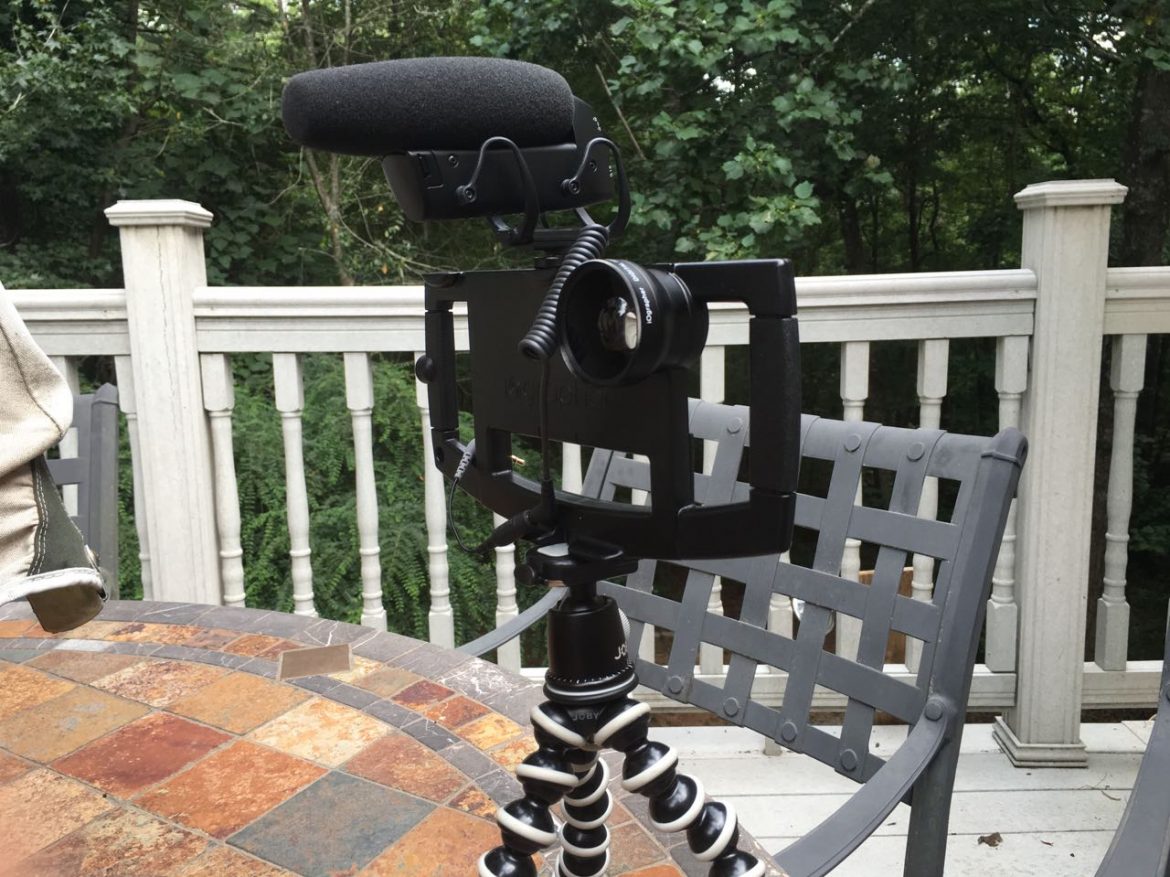
Prior to a recent cruise I picked up the iOgrapher for my iPhone 6. Having seen the product at NAB a few times, I knew it created a stable camera platform for the iPhone making the camera much more useable. I was more than impressed with the stability and ease of use of the system. In fact I shot a LOT more video than I originally intended on the cruise. While I was really happy with the with overall results, I felt that camera control and audio quality were lacking. The iPhone camera auto irises too much and the color temperature changes, sometimes at random. When the phone is mounted into the iOgrapher, the microphone is essentially blocked by the unit. So before my next trip, I knew I wanted to improve both areas.
For audio, first off, you’ll need an adapter to convert the stereo TRS mic feed into a TRRS signal that can be recorded by an iPhone or iPad. Just connecting the stereo mini jack to the phone or iPad will not work. Here’s the Rode SC4 adapter I picked up for this purpose.
The first mic I purchased was the Rode VideoMic Pro which was recommended to me by multiple folks, but the darn thing didn’t work. The first 9v battery I installed overheated to the point of needing tongs to extract it from the battery compartment because I couldn’t touch it. Yes, it was installed correctly, but it overheated. I absolutely HATED the battery configuration on this unit. The battery door is below the front of the mic requiring you to remove the mic cover, the battery door itself feels like it’s going to break, and to actually get the battery out, you need to pry it out with something. So instead of having a replacement unit shipped to me, I decided to go with something else.
I found the Shure LensHopper VP83 which was highly rated on multiple sites and it takes a AA battery which I prefer to the 9v. There is also the VP83F model which has an onboard digital recorder. The mic comes with shock mounts which are a must, low cut filter and three position gain (-10db, 0, +20db). I can say the mic just works. Battery installation was a snap, connect it to the phone and that’s it. It’s VERY directional staying focused on what’s in front of the camera and minimizing off axis sound. Very impressed for a sub $200 mic.
For camera control, Filmic Pro was a highly recommended app and very reasonably priced. Clicking the gear icon at the bottom brings up a standard set of controls for your recordings. On my new iPhone 6s I can set the Resolution as high as 4k 100Mbps! Generally I leave the resolution set to 1080p 50Mbps and that gives me a great recording. Frame rates can get from timelapse up to whatever is the highest speed available on your device.
Looking at the main app screen You’re presented with what looks very familiar from a “regular camera” viewfinder.
Right away you can see how nice it is to have the running time and audio meters right there at the bottom of the image. To the right of that you can also see both a battery indicator and right below that, a storage indicator. Nice touches that we’re used to seeing in “regular cameras.”
The two overlays on the screen are “reticles” with the circle being exposure and the square being focus. Simply drag each reticle to the area you’d like to draw your exposure from and keep in focus. If you’d like to lock focus or exposure, simply tap them so they become red. Locking the exposure is especially sweet so you don’t get a whole series of iris changes in the middle of a move.
In the upper left of the image you can see a twirl down triangle, click that to reveal a series of additional controls across the top.
Manual audio adjustment, grid pattern, camera stabilization, reverse camera, the light and my favorite, zoom control.
Tapping on the zoom control brings up the zoom slider on the right. Simply touch and hold the + or – to zoom in and out with the camera. It’s easy to control with my right thumb while holding the iOgrapher and it’s surprisingly smooth. Down in the lower left you can see what looks like a flower icon, that’s white balance.
Press and hold most any control and you’ll be presented with full manual control over that option.
Here I’ve brought up the manual exposure controls which include ISO, Shutter Speed and Exposure. Simple select the parameter to be adjusted via the icon on the bottom, then slide the adjustment up or down to make the changes. The controls the are same for manual audio, white balance / color temp and many other controls.
This is a great little app for taking control of the camera and making your iPhone a very good camera platform. There are other apps out there to take control of your camera like Mavis, which is another app I’ve recently been made aware of. I do also highly recommend the JOBY GorillaPod SLR-Zoom unit as it has the independent leveling head on it. Very useful in the field.
This is going to be a great little rig not only for vacation, but I’m going to start putting something like this to work in production as well. Here’s a quick 4k Camera Test I did recently at a beach.


